
Arbitrage API quick start
The document contains instructions on how to connect to the Arbitrage API from arbitragescanner.io
docs: link
1. Choose your strategy and filters
If you are going to trade using the spot-spot strategy, you need to use the Arbitrage Screener for this step. If you want to arbitrage using the spot-futures, futures-spot, or futures-futures strategy, you need to use the Futures Screener for this step.
If necessary, we can send detailed instructions on setting up spot and futures scanners separately.
In short, you need to set the filters in the web interface and see what spreads are available. If there are spreads and you are satisfied with them, you can proceed to the next step and create a webhook. If not, try changing the filters. If you need recommendations for filters, feel free to ask, and we will be happy to help.
2. Create webhook
A webhook is like a “door” where our system sends the signals to your server.
Currently, there are two ways to create a webhook: through the website and using the documentation.
2.1 Create through website
To create a hook through the website, you need to go to the website, click on the "Add" button, then specify the settings for your webhook, and finally click on the "Save" button. If all the parameters are specified correctly, the webhook will be created and displayed in the list.
The list of hooks has buttons for managing hooks:
- details - to view your hook settings
- stop - to stop sending spreads
- delete - to delete a webhook
2.2 Create through docs
To create a webhook, you need to go to the documentation page and select "Create Spot Spread Hook" to create a webhook (if you need a spot-spot strategy) or "Create Perpetuals Spread Hook" for other strategies.
After going to the documentation page and selecting the desired endpoint, you need to fill in the fields in the "body params". section with the same values that you specified in the web screener in step 2

After setting the desired parameters, enter the API key in the Credentials field, then click the "Try it!" button.
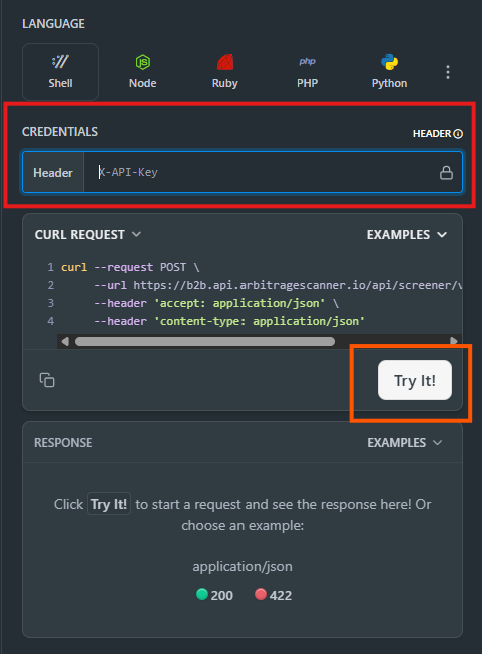
Congratulations, the webhook has been created!
3. Set up your server
Your server is simply a program that “listens” at the address you put in the hook field.
Example: if your webhook URL is https://example.com/myhook, your server should be ready to receive messages there.
To make it easy, we shared a simple Python snippet you can clone and run — this shows how your server should accept data.
In the README of the repository, you can find instructions on how to install and configure it
You can check the correct configuration of your server using a test request. If your server is configured correctly, the data received from the request will be displayed in your server console
4. Process the incoming signals
Once your server works, it will start receiving spreads (trading signals) as soon as opportunities appear.
You can now adapt the handler to your needs — for example:
- Save data into your database
- Send alerts to Telegram
- Or trigger your trading bot